Well, my friend Sandy T has convinced me to join in on What's On Your Workdesk Wednesday after making comments on several of her blogs about WOYWW. So this is for you Sandy! Last night I went to my craft room which I typically do after dinner. I've been on a card making kick for a couple of weeks now. I'm a scrapbooker at heart but recently figured out how easy it is to make cards! I used to think it was too hard. Silly me! A 4.25x5.5 space is much easier to create with than 12x12! I also LOVE to take pictures and my stacks and stacks of printed photos is a bit overwhelming when I see how far behind I am! I also have several events I need cards for. I'm a little timid....so go easy on me.... here's my work space.
This isn't really all that messy. It has been worse. The pink card with the little girl on it I was making for my granddaughter who lives out of state. I started it last night and finished it this morning before work. I was wanting to get it in the mail today. I made myself late! The card to the far left is a Father's Day card for my son-in-law. There's another card hiding behind my Copic markers that is for a high school graduation Friday night of a teenager that attends my church. Under my cutter is paper for another graduation card I need to make for my niece who will graduate next Friday.
Well, that about does it for my work space! If you've got time go check out Julia's Stamping Ground blog and check out the desks of other crafty people! Ya'll have a good one!
Wednesday, May 23, 2012
Tuesday, May 22, 2012
A Book for Remi
I chose to start her book with her birthday party which was in November. Vanessa planned a party at the park. Vanessa told me that after her party was over that day that she wanted to "have her birthday again". At least we knew she had a good time!
These are of Christmas. The pic on the right is her finding her ornament on the tree I bought for her.
These are some of my favorite photos! Taken in September last year. Daddy having tea with his girls! What a man that is willing to wear a hat and play tea party knowing his mom-in-law will take pics and post them on the web! That's a good Dad!
Making bubbles while Granddad watches. Remi & Kennedy using Granddad's "inkers" to write on paper.
Visiting Granddad at the fire station and getting a tour of the fire truck and ambulance.
Pics with Daddy, sister and Granddad.
Pretty girls in pretty flowers...take this spring.
Having fun on Valentine's Day with Savtah. We played in their room and acted silly!
Of course we had to put the dogs and kitties in her book. This is what I wrote on the last page:
I made this book for you to look at when you are not with us
and to show your Mommy the people who love you when you come to visit.
You are very precious to me. I hope you enjoy your book.
I look forward to your visits. I love you very much
Savtah
In my haste to give Remi her book I failed to get a picture of her with it so I asked Daddy to do that before he took her home. He did...after he bathed them...so their hair is wet! Aren't they just the cutest things?!
You want to know the sweetest thing? When I showed Remi her book she hugged my neck and told me "thank you"! That was my undoing! How does a 3 yr old know how to appreciate something like that?! I was blown away! She has captured my heart just like my Lil' Peanut!
Monday, May 21, 2012
Jingle Bell Inspiration
I'm back to enter another card in the ABC Christmas Challenge "Jingle Bells".
For this card I used MME 12 days of Christmas "It's the Season" and card stock for the mat and card base. I neglected to see what the color names were of the card stock papers. The most difficult part of this card was the stamped image.This stamp is a Hero Arts I believe. I couldn't find anything on the stamp to identify who made it. I stamped with Memento Black Tuxedo ink. Some of the leaves I colored with my Copic Markers G94 and G99. The rest of the image I painted with Luminarte Twinkling H2O's by Creative Imaginations that I purchased from my LSS Cat's Creations Scrapbooks. The holly leaves I used Olive Vine. The red ribbon I used Poppy. The bells I used Egyptian Gold, Chestnut, Majestic and Kiwi. For the berries I used clear rhinestones from Queen & Co and colored them with my Copic Marker R29. I cut out the image with a circle cutter and matted it with the same green card stock I used for the card base. I popped the image with foam tape and added a bit of ribbon.
Thanks for looking!
For this card I used MME 12 days of Christmas "It's the Season" and card stock for the mat and card base. I neglected to see what the color names were of the card stock papers. The most difficult part of this card was the stamped image.This stamp is a Hero Arts I believe. I couldn't find anything on the stamp to identify who made it. I stamped with Memento Black Tuxedo ink. Some of the leaves I colored with my Copic Markers G94 and G99. The rest of the image I painted with Luminarte Twinkling H2O's by Creative Imaginations that I purchased from my LSS Cat's Creations Scrapbooks. The holly leaves I used Olive Vine. The red ribbon I used Poppy. The bells I used Egyptian Gold, Chestnut, Majestic and Kiwi. For the berries I used clear rhinestones from Queen & Co and colored them with my Copic Marker R29. I cut out the image with a circle cutter and matted it with the same green card stock I used for the card base. I popped the image with foam tape and added a bit of ribbon.
Thanks for looking!
Treasure In My Backyard
My rig with the horses. Yes, I know there are two horses and only one of me! I have a system when I don't have anyone to ride with me. I ride one and lead the other then switch. I am looking forward to when my Lil' Peanut is big enough to ride along unassisted! The big bay is my horse Clyde and the other horse belongs to the people who own the property where I keep my horse. At the end of the parking lot is the where the trail begins.
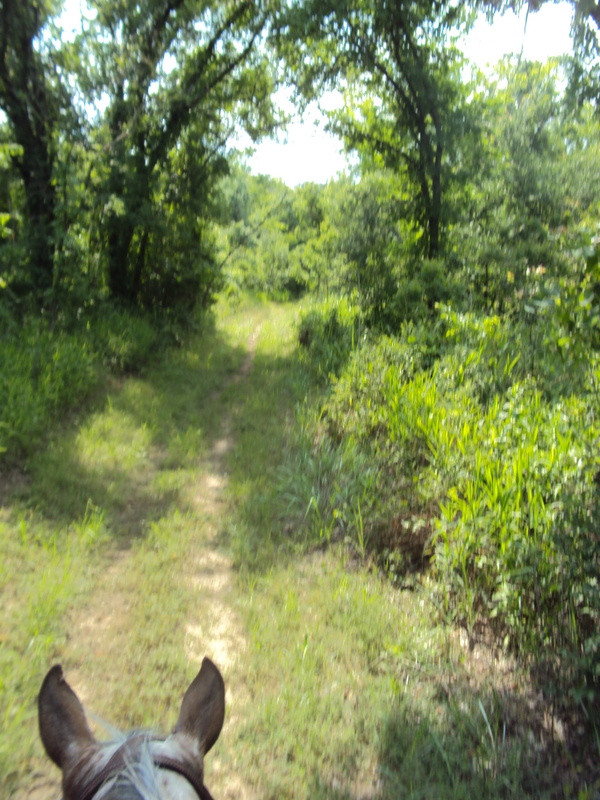
The State Park is just beautiful this time of year! Wildflowers are everywhere, its green and foliage covers the trails several places making for a nice canopy of shade. I took time out from my ride every so often to take pictures. I want to go back with my big camera. I was using my compact digital on the ride (less expensive to replace if it gets damaged!)
A picture of some of the trail. These yellow flowers are EVERYWHERE!
Isn't this a beauty?
Last week, my son-in-law came with me. He's enjoying the scenery. It was his first time to ride out here.
Here we are going through the low water crossing.
I just love these trails! I could stay out here for days....but alas....I must go home. Until next time...Happy Trails to you!
Sunday, May 20, 2012
Father's Day Inspiration
Father's Day is a month a way but I know if I don't start now trying to make my cards they won't get done. I learned about Seems a Little Sketchy from a couple of friends' (Sandy and Allison) blogs I follow. After visiting the site I decided to be brave and jump in! I used Sketch 13 sponsored by Bugaboo Stamps to create this card.
I chose to make this card a 6x6 as I plan to hand deliver this card to my husband for Father's Day. I actually began with my stamped image and then created the card around the image. For the card base I used a solid card stock. The printed papers are Creative Imaginations Samantha Walker "Cowboy" line. The blue paisley is "Cowboy Borders" cut 4.25 x 5.5. The plaid paper is "Ride On" cut 4 x 5.25.
The stamp came as part of a set I purchased off Ebay as a retired Stampin' Up set. I colored the horse with my Copic Markers E53, E55, E57 and I used E53, E55 for the ground. I used Copic Marker B21 for the sky. Using a 3 inch circle die I cut out the image. I wasn't pleased with my result. The image still needed something. I decided to break out my sewing tools I have from Bazzill and We R. Using a temple I poked holes on the outer edge of the image. Using twine I sewed around the circle. I liked this look much better! I applied foam tape to pop the image.
Looking in my stash of western embellishments I found this felt horse shoe. Using some brads I had for horse show nails and popped this image with foam tape. The sentiment is a stamp from Hero Arts. It reads "A Father is one of Life's Special Gifts". I chose to stamp part of the sentiment to place on the front and the remainder I stamped on the inside of the card. I used a punch to make the sentiment. I matted the sentiment with the same blue paisley paper and popped with foam tape. Using the same twine I sewed the stamped image with I wrapped the card twice and tied in small bow.
Thanks for taking time to look. Hope you enjoy!
Monday, May 14, 2012
Enjoy the Season
Well, I had so much fun creating my card for the ABC Christmas Challenge that I was inspired to try to make one more before the challenge I is for Icy Inspiration is over. This time the photo I used for inspiration was the penguins and snow. I remembered I had some penguin stamps.
I found a pack of 6x6 textured papers from Bazzill Basics called Two Scoops that I had gotten from my LSS Cat's Creations Scrapbooks. I wanted to choose a bright paper and found this blue that I loved! I stamped the snowflakes with a retired stamp set from Unity called Little Jolly Winter using embossing ink and white embossing powder. I stamped the snowy hills, applied glossy accents, added Diamond Dust and set aside to dry. I stamped the sentiment with embossing ink and used black embossing powder. I cut out the sentiment to look like a sign and inked with Distress Ink Vintage Photo. I cut a strip of paper to make the sign post and colored with my Copic Marker E79. I stamped the penguin and colored with my Copic Markers C1, Y17 and E79. I popped the penguin with some foam tape. The ribbon is from my stash. I don't know if I'll do this every time but we'll see! Hope you enjoy and thanks for taking time to look!
Sunday, May 13, 2012
Merry Christmas in May?!
Yes, if you're a card maker and want to make your Christmas cards you need to start early. The earlier the better! I've had the urge to make Christmas cards for a few weeks but the demands of other crafting projects made me keep shoving the Christmas card idea to the back burner. I have been following a friends blog Sandy Trefger as she quite frequently makes cards and enters card challenges. I became intrigued and checked out some of them. One in particular caught my attention ABC Christmas Challenge. After quizzing my friend and her graciously giving me some how to's I decided to be brave and jump in. I chose this one as 1) I need to start making cards for Christmas 2) I have two weeks to complete a card 3) I can start right where they are in the challenge (they are on Letter "I") "I" is for Icy Inspiration.
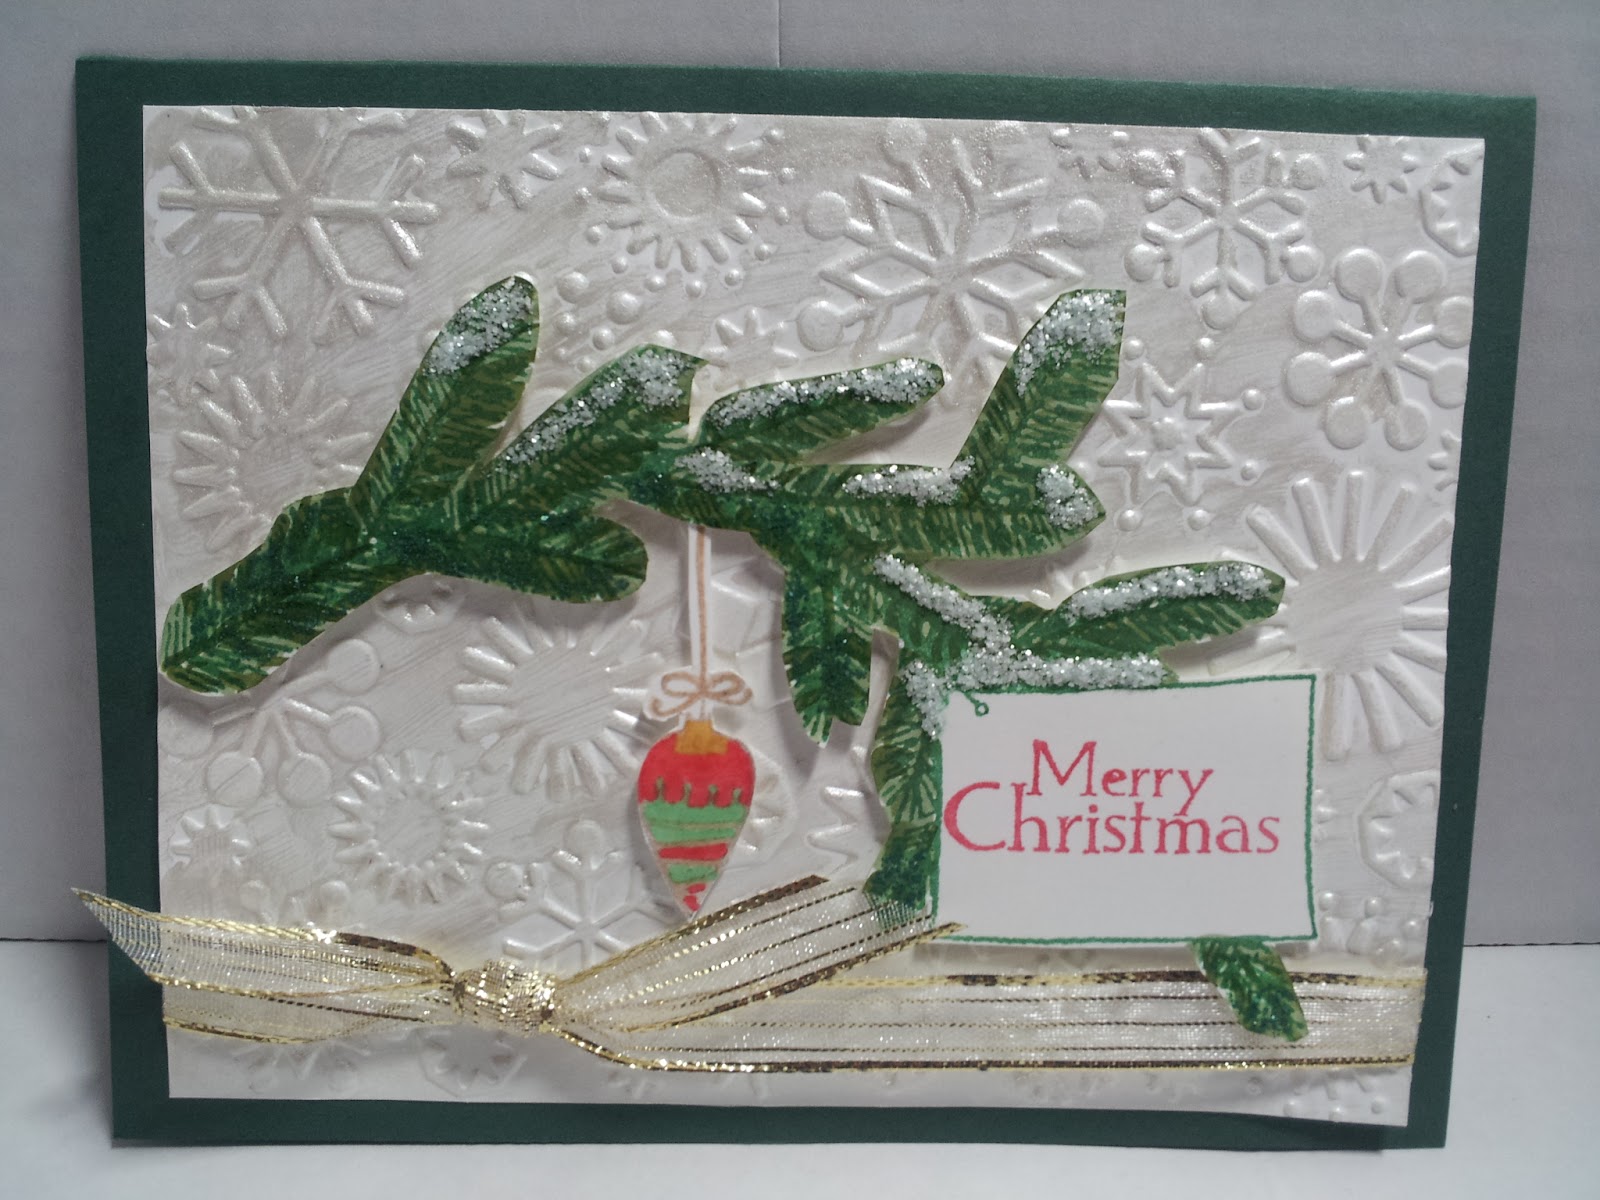
This card is rather simple but I really like how it turned out. The photo I used for inspiration was branch and snow. I remembered I had a stamp that looked very similar and although I wasn't really trying to duplicate the photo for inspiration I almost did!
I began with a card base using a solid color card stock. It was already cut and scored for use when I was making Christmas cards last year. I embossed a smooth white piece of card stock using a Cuttlebug embossing folder and put through my Big Shot. The embossing folder didn't have a name on it but the design is snowflakes. Once embossed I trimmed it to 4 x 5. I had some all purpose ink (frost white) that I had purchased from Stampin Up that I covered the embossed paper with giving it a sheen. I stamped the branch, ornament and sentiment using Christmas Bough from Unity.
I used Memento "Cottage Ivy" to stamp the branches. I wasn't very pleased with the color so I went back over the image with my Copic Markers G94 and G99. To give it a more "icy" feel I used Distress Stickles Pine Needles. Unfortunately it doesn't show well in the photo. For the snow I used Distress Stickles Picket Fence. I stamped the sentiment in the box with Memento Lady Bug. I cut out the branch and popped it with foam tape. I stamped the ornament image with Memento Desert Sand and colored the ornament with my Copic Markers YR23, R24, and G03. I then applied Glossy Accents to give it an epoxy look. Once it dried I cut it out and popped it with foam tape as well. As a finishing touch I used some ribbon I had in my stash. Most of the products I use for crafting come from my LSS Cat's Creations Scrapbooks.
Thank you for taking time to look at my very first attempt at a card challenge! It's not too late for you to join in on the fun and create Christmas cards from A to Z, just click on this LINK and jump right in!
This card is rather simple but I really like how it turned out. The photo I used for inspiration was branch and snow. I remembered I had a stamp that looked very similar and although I wasn't really trying to duplicate the photo for inspiration I almost did!
I began with a card base using a solid color card stock. It was already cut and scored for use when I was making Christmas cards last year. I embossed a smooth white piece of card stock using a Cuttlebug embossing folder and put through my Big Shot. The embossing folder didn't have a name on it but the design is snowflakes. Once embossed I trimmed it to 4 x 5. I had some all purpose ink (frost white) that I had purchased from Stampin Up that I covered the embossed paper with giving it a sheen. I stamped the branch, ornament and sentiment using Christmas Bough from Unity.
I used Memento "Cottage Ivy" to stamp the branches. I wasn't very pleased with the color so I went back over the image with my Copic Markers G94 and G99. To give it a more "icy" feel I used Distress Stickles Pine Needles. Unfortunately it doesn't show well in the photo. For the snow I used Distress Stickles Picket Fence. I stamped the sentiment in the box with Memento Lady Bug. I cut out the branch and popped it with foam tape. I stamped the ornament image with Memento Desert Sand and colored the ornament with my Copic Markers YR23, R24, and G03. I then applied Glossy Accents to give it an epoxy look. Once it dried I cut it out and popped it with foam tape as well. As a finishing touch I used some ribbon I had in my stash. Most of the products I use for crafting come from my LSS Cat's Creations Scrapbooks.
Thank you for taking time to look at my very first attempt at a card challenge! It's not too late for you to join in on the fun and create Christmas cards from A to Z, just click on this LINK and jump right in!
Subscribe to:
Posts (Atom)